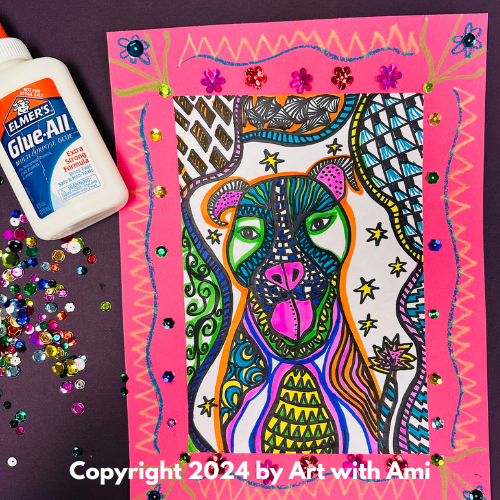
Alebrijes were first created by a Mexican artist named Pedro Linares. He had a strange dream one day with many strange and colorful animals that kept repeating the nonsensical word “alebrije.” This is where his inspiration came from when he began creating paper mache sculptures of fantastical animals and painting them with bright colors and decorative patterns. The tradition of creating them were passed down through Pedro Linares’s family and spread to other parts of Mexico as well. They are even found in popular culture, such as in the movie “Coco!” This art lesson works great for Hispanic Heritage Month as well as a lesson on Mexican Folk Art.
On a 6″ x 9″ piece of white sulphite paper, I demonstrated drawing a simple contour image of an animal. Students should find an image resource (I have several magazine and printed images) to help in their drawing, however their drawing can be simplified and even somewhat abstract if they choose. My county provides student laptops, so I show them how to google contour or silhouette images of their animal choice.

For students who would like more realism, one easy way to draw a realistic contour image is to use graphite paper. I placed a piece of graphite paper over the drawing paper, taped down. Students laid their chosen image over both papers (also taped down) and outlined with a pencil over all of the contour lines of the animal to print in graphite onto white paper.

Once they have their image drawn, I have them outline the entire drawing with a thick Sharpie and draw in some sectioned areas. Then students can begin patterning! I like to have a mash up of simple pattern idea sheets as well as some zentangle and other more complex pattern idea sheets. I offer thick and thin Sharpies for this part. And, I demonstrate to students the importance of good penmanship by slowing down and carefully drawing patterns!

Once patterns have been drawn, students can begin adding color to their drawings with markers and color pencils.

Once students have added color, they can choose a 9″ x 12″ sheet of colored construction paper. I offer a lot of bright colors here. Students should glue their smaller drawing nicely centered on their larger paper, leaving about an 1 1/2 inch border on all sides. Once their drawing is glued down, students can add a symmetrical border design with oil pastels. Neon oil pastels work beautifully for this and are so vivid, if they are avaliable!

An optional final touch can include adding some embellishment in the form of sequins, glitter, or anything else that grabs attention and gives a bit of sparkle!

